Just a quick post today to show you how to change the NIC (Network Interface Card) Binding Order on your Windows 2019 server.
Why would you want to do this? You may feel like access to your server file shares or other services may seem like it's slightly delayed or unresponsive. This in my experience is due to the order that Windows sets your Network Providers when you initially installed the operating system.
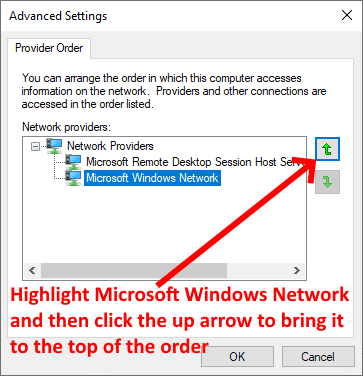
In most cases, you'd want the Microsoft Windows Network as the primary or first listed provider and then other providers in the order you wish them to be considered by Windows as a Network Connection.
This is primarily because your file shares and other services will be delivered over the Microsoft Windows Network connection, rather than say an RDP Session Host Server Network Provider.
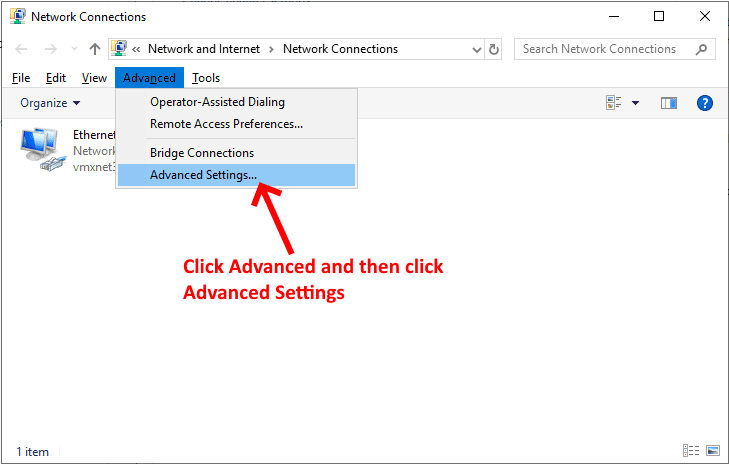
So how is the order changed? It's pretty simple really, but there is a small trick that you need to be aware of that enables you to access the Advanced Settings menu.
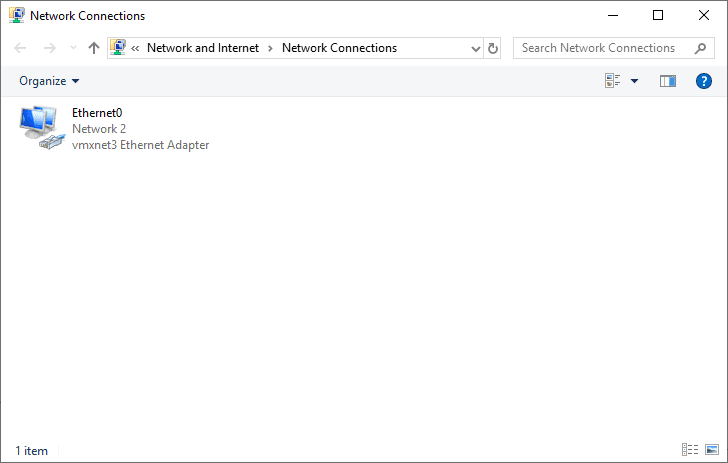
To start process, open Control Panel and click on Network and Sharing Center. Once the Network and Sharing Center window is opened, click Change adapter settings and you should see a window similar to the following:

As you can see by the image above, there are no menu items displayed other than Organize. To display the advance menu you need press the <Alt> key on your keyboard. Once that is depressed the advanced menu becomes available as in the following screenshot:

Once the Advanced Settings window is displayed follow the instructions on the screenshot below:

Click OK to save the order and that's all there is to it, you're task is complete.
If you've found this useful, you may want to sign up to our newsletter where you'll receive notices on when we post new articles and helpful "how tos". Just fill out your details below and we'll do the rest...


1 Response