This will guide you through the process of exporting your Office 365 email to a PST for archiving or backup purposes. Let's begin...
Before you can start the process you need to ensure your global admin account has the correct permissions to carry out this task. To update the permissions do the following:
- Log onto https://portal.office.com using your global admin account
- Expand Admin Centers and click Security & Compliance
- Click Permissions
- Select Compliance Administrator and from the resultant pop up side panel scroll to the bottom and under the members heading click Edit
- Click Choose Members and search for your global admin account and save it as a member. Save all the way though and close the side panel
- Select eDiscovery Manager from the permissions list and from the resultant pop up side panel scroll to the bottom and under the eDiscovery Administrator heading click Edit
- Click Choose Members and search for your global admin account and save it as a member, Save all the way though and close the side panel
- You've now setup the necessary permissions. This will take 2 hours to propagate through so please be patient
Once your permissions have been successfully propagated, we can go onto the next step.
- On the Security & Compliance page, click Search & Investigation and then click eDiscovery
- Click the Create a case button
- In the resultant pop out pane on the right, give the case a name and a description and click Save
- Now the case is in the list of eDiscovery items. Click the Open button and it will open in a new tab
- In the new case tab in your browser click the Search tab
- Now Click the + New Search button to add a new search
- Click the option Specific locations and click modify
- Click the option Choose users, groups, or teams link in Exchange email group
- Click the Choose users, groups, or teams button and choose the users you want to export their email to PST
- Click Done
- Click Save
- Now click Save & Run. This will execute your requested task
- A preview of emails will be displayed to give you an indication of what was discovered. This is NOT the final result just a preview, so don't get concerned when you only see two pages of results
- Now click the More option at the top of the screen and select Export Results and use the following settings:
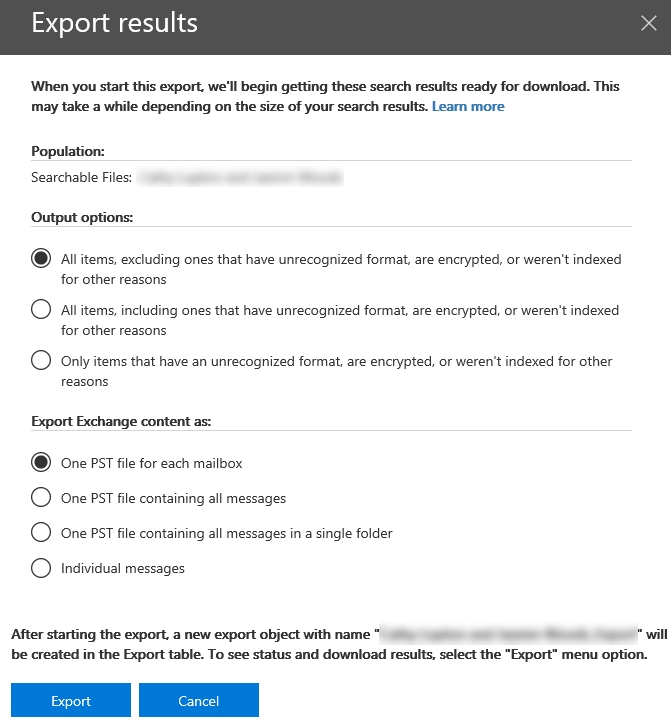
- Once done, click Export
- Click the Exports tab at the top of the screen and selected your recently created export task from the list and a pane will be shown on the right that indicates the current progress of the task. This can take a while so be patient. You can click the refresh link to update the progress bar as in the following example:
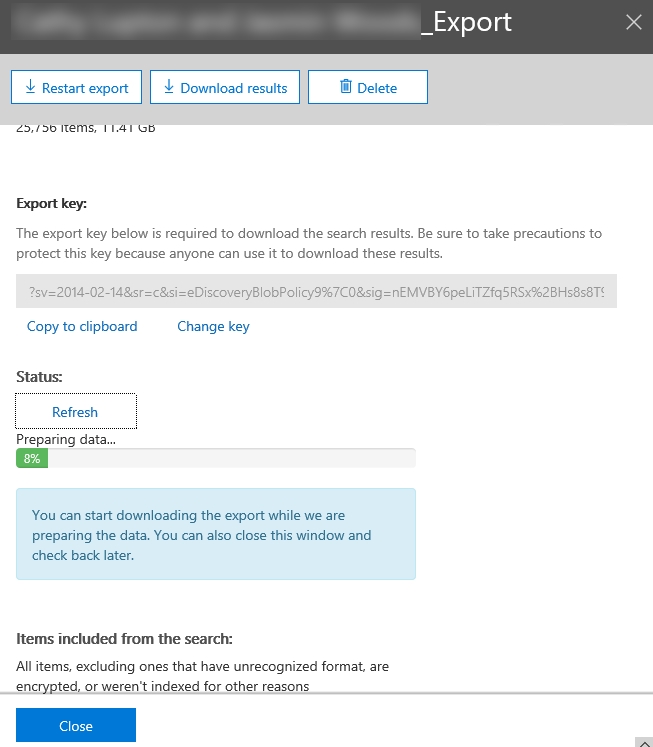
- Once your export task is complete you can download the file. Before starting click the link Copy to clipboard. You need this string when you go to the next step
- Click the Download results button at the top of the screen. Click Open. Please be aware the this download will only work if you use IE or Edge browsers
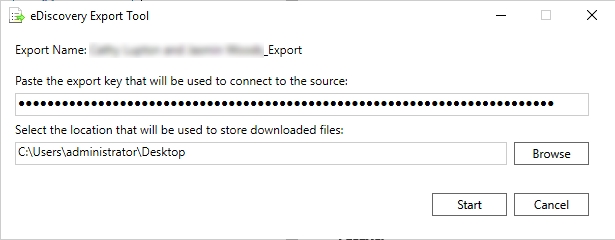
- Paste your clipboard value into the first field and click browse to choose where to save the file. Click Start to commence the download as in the following 2 examples:
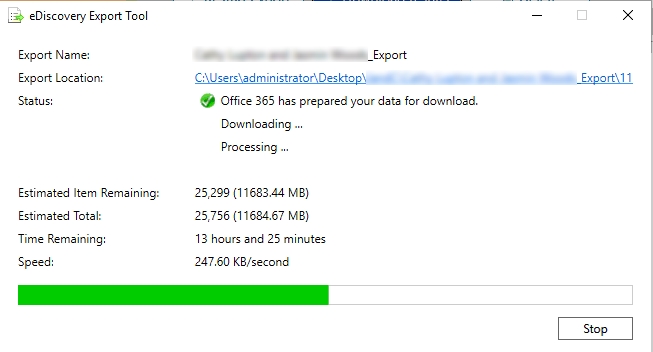
Once the task is complete, you'll have the PST saved into a sub folder called Exchange for each respective file.
If you've found this useful, you may want to sign up to our newsletter where you'll receive notices on when we post new articles and helpful "how tos". Just fill out your details below and we'll do the rest...


