This is just a quick post to show you how to remove a user who is managed by your on-premise Active Directory via AD Connect, to your O365 tenant. I had a hell of a time figuring this out so hopefully this saves you the time and effort.
This tutorial is being done on an SBS 2011 server and AD Connect is run on Win 2012R2, but will work on any version of Microsoft Server. Let's start...
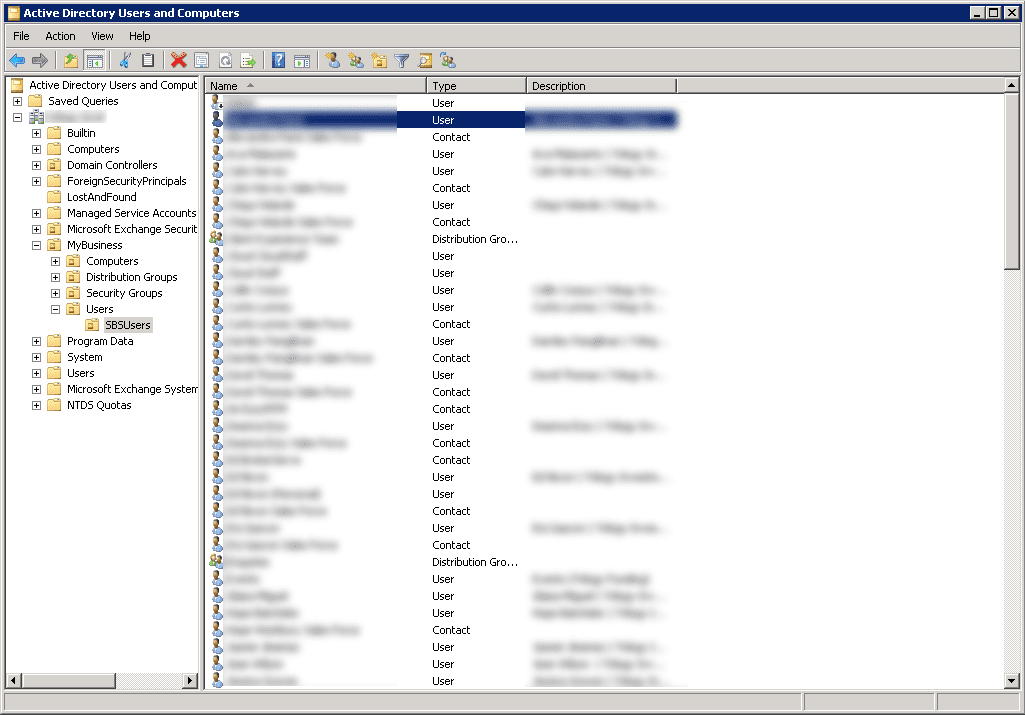
Firstly, log onto your domain controller and open up Active Directory Users and Computers. Now navigate to your Users OU like the following example:
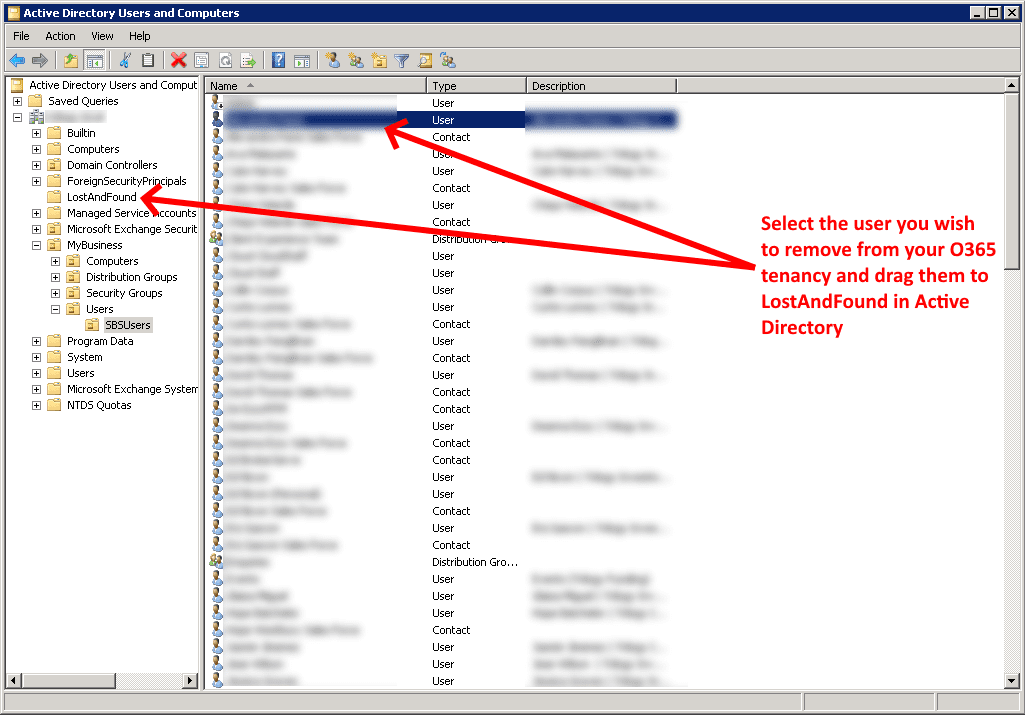
Highlight the user you wish to remove from your O365 tenancy and drag them to the LostAndFound folder in Active Directory as shown in the following example:
We're now going to initiate a sync via PowerShell for AD Connect on our Win 2012R2 server that has AD Connect installed.. Open up an Admin instance of PowerShell and type in:
Start-ADSyncSyncCycle -PolicyType Initial
You should receive the following response when the command has been run:
PS C:\Windows\system32> Start-ADSyncSyncCycle -PolicyType Initial

                                                                                                                 Result
                                                                                                                 ------
                                                                                                                Success
To check the progress of your AD Sync, open up Synchronization Service Manager and you should something similar to the follow screenshot:
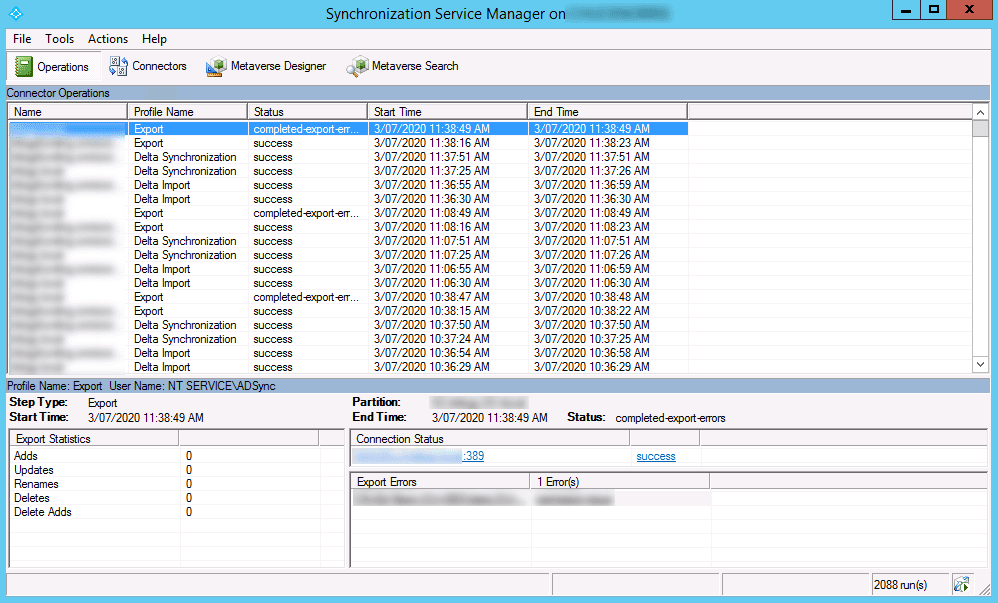
Ensure you have success listed in the Status column and you have addressed any errors that are shown in the Export Errors section. Once your sync is complete, you can now log onto your tenancy via:
Follow the screenshot below to verify the user that you moved to LostAndFound in Active Directory is now listed in Deleted Users in your O365 portal:
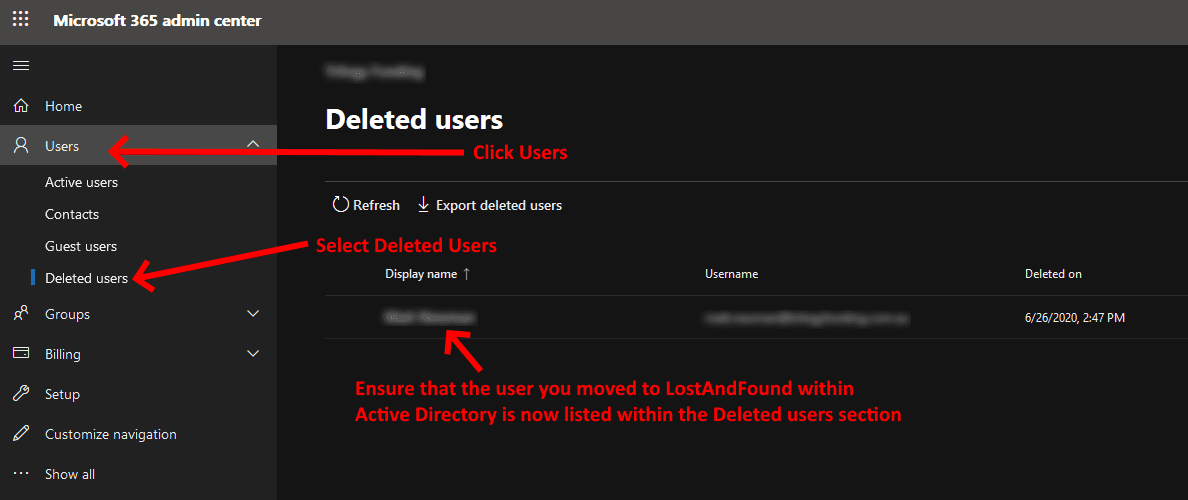
Once we've confirmed the user is in Deleted users, we can now run a PowerShell script to permanently delete them like so:
First create PowerShell session to O365 via:
connect-msolservice
Then input your O365 administrator username and password.
Now we can run the following syntax to delete the user:
Remove-MsolUser -UserPrincipalName [email protected] -RemoveFromRecycleBin
Replace [email protected] with your users actual email address in the example above.
That's it, you're all done...
If you've found this useful, you may want to sign up to our newsletter where you'll receive notices on when we post new articles and helpful "how tos". Just fill out your details below and we'll do the rest...


