When installing applications on a Windows RDS server or formerly known as a Terminal Server, there are special procedures that need to be followed to ensure that the application will run properly under a multi-user environment.
I am assuming you have already confirmed that the application you are installing will run under an RDS environment. Today, in most cases this isn't an issue, but for some older and some poorly coded apps this can cause you problems and even Blue Screen (BSD) your server, so you should always check.
So now that you've checked and your application is compatible with an RDS environment let's get started. There are 2 ways of carrying out an install firstly, via the command line and secondly via the Control Panel.
Command line procedure:
Open up a command prompt and execute:
change user /install
That will put your server into "install mode". You can now run your applications installation package by running the exe of msi file. Once the install is complete return to your command prompt and run:
change user /execute
This returns your server to an "Execute" state rather than an "Install" state. You can also check the status of your server install mode by the using following:
change user /query
The second method is via your server's Control Panel. Open the Control Panel and select Install Application on Remote Desktop as in the following example:

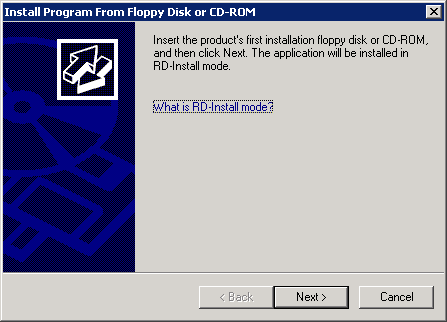
You will then be presented with the Install Program dialogue screen. Simply click the Next button:
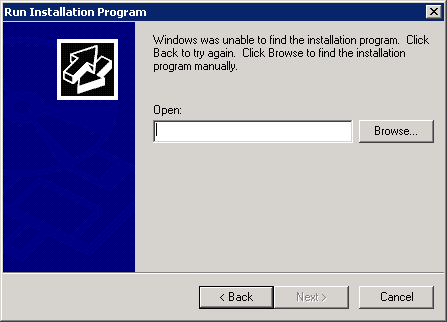
Next the Run Installation dialogue will be displayed. Simply click the browse button and navigate to your installation package. Once you've selected your install package click Next and follow your application's installation procedure.
You're done!
If you've found this useful, you may want to sign up to our newsletter where you'll receive notices on when we post new articles and helpful "how tos". Just fill out your details below and we'll do the rest...


